Tracking state changes with the Zustand plugin
Zustand is a very fast and minimalistic replacement for state management solutions like Redux. With our Zustand plugin, you can keep track of the state changes throughout the life cycle of your application.
Installing the plugin
Section titled Installing the pluginThe plugin can easily be installed with the following command:
npm i @openreplay/tracker-zustandUsing the plugin on a Next.js app
Section titled Using the plugin on a Next.js appNote: the full source code of this example is located in this Github repo, check it out if you need more details.
The Context provider I’m using allows for the configuration of Tracker Plugins, so after installing the plugin, we’ll modify the _app.tsx file by adding the import statement below:
import trackerZustand from '@openreplay/tracker-zustand'And then, the main App function should look like this:
export default function MyApp({ Component, pageProps }: AppProps) {
  const Layout = (Component as any).Layout || Noop

  useEffect(() => {
    document.body.classList?.remove('loading')
  }, [])

  let plugins = [
    {
      fn: trackerZustand,
      name: 'zustand',
    },
  ]

  return (
    <TrackerProvider
      config={{
        plugins
      }}
    >
      <Head />
      <ManagedUIContext>
        <Layout pageProps={pageProps}>
          <Component {...pageProps} />
        </Layout>
      </ManagedUIContext>
    </TrackerProvider>
  )
}
This will automatically initiate the plugin with the tracker, and it will also make avaiable the data returned from executing the plugin’s main function.
The next thing is to create a store, we’ll be adding products from the e-commerce site into this store in a minute.
Creating a store with the Zustand Plugin
Section titled Creating a store with the Zustand PluginThe use of the plugin requires you to change the way in which you normally instantiate a Zustand store, so feel free to copy&paste the following code as a template:
import create from 'zustand'

const productStore = null
export const useProductsStore = (logger) => {
  if (!productStore) {
    //use a singleton pattern to make sure we only create the store the first time around
    productStore = createProductStore(logger)
  }
  return productStore
}

function createProductStore(logger) {
  return create(
    logger((set) => ({
      products: [],
      addProduct: (p) =>
        set((state) => {
          const prodFound = state.products.find((prod) => {
            return p.id == prod.id
          })
          if (prodFound) {
            p.amount = prodFound.amount + 1
          } else {
            p.amount = 1
          }

          return {
            products: [...state.products.filter((prod) => p.id != prod.id), p],
          }
        }),
    }))
  )
}
The exported function will create the store the first time it’s used, but afterwards, it will simply return the existing one.
On the other hand, the createProductStore function will create the store, set the logic for the addProduct method and use the logger function that we provide to it. This logger, as you’ve probably guessed it, is the one we received from using the Zustand plugin.
With the store ready, we can start adding product into it.
Adding products to our store
Section titled Adding products to our storeThe store exports the addProduct method, which takes care of keeping track of the products in our cart.
To import the function into your code, you have to:
- Import and use the Tracker’s context provider.
- Get the pluginsReturnedValue attribute from the context.
- Use it to call the zustand method (notice the method is named after the name attribute when we configure the plugin above), and pass a string attribute to give the store a name (this name will be used during the replay).
- The zustand method will return the logger which we’ll use when calling the useProductStore hook from zustand (the one we created for the store).
This all seems like too much, but essentially it all translates into:
const { pluginsReturnedValues } = useContext(TrackerContext)

const useProductStoreTracked = useProductsStore(
  pluginsReturnedValues.zustand('products_store')
)
const { addProduct } = useProductStoreTracked()
Now, you can simply call the addProduct method, and it will add the cart products to the store.
Reading data from the store
Section titled Reading data from the storeAs you can probably guess, if you want to read data from the Zustand store, you have to do the same set of steps. But instead of taking the addProduct method, we’ll take deconstruct the products array.
Like this:
const { pluginsReturnedValues } = useContext(TrackerContext)

const useProductStoreTracked = useProductsStore(
  pluginsReturnedValues.zustand('products_store')
)
const { products } = useProductStoreTracked()
You can then iterate over the products normally:
<div>
  {products.map((p: Product, idx: Number) => {
    return (
      <div key={+idx}>
        {p.name}({p.amount})
      </div>
    )
  })}
</div>
The above code iterates over the list of products and renders them on screen. Whenever you add another product to the store, it’ll be updated here as well.
Sync the state with session replay
Section titled Sync the state with session replayTo review the state changes during the replay, simply click on the new Zustand tab on the lower right corner:
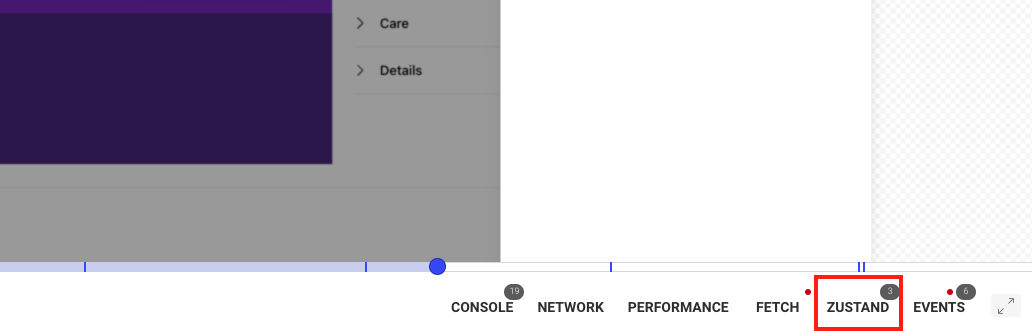
When clicking on it, you’ll see the content of the store, and you’ll be able to understand how it changes and the data saved within it:

Notice the name of the store, it’s actually the name we used when calling the zustand method the first time around.
Have questions?
Section titled Have questions?If you’re not using Next.js but other framework, the way of using it should be similar, the key is the way in which you create the store. As long as you find a way to use the logger function when creating it, you’ll be able to track the state during the replay.
You can check out this repository for the complete source code of a working Next.js application with the Zustand plugin.
If you have any issues setting up the Zustand plugin on your project, please contact us on our Slack community and ask our devs directly!