Using OpenReplay with Svelte
Installing the OpenReplay tracker into a Svelte-based project is relatively straightforward.
The key to making it work will be the use of context, which, while it sounds similar to how we do it with Next.js, the implementation will be different.
SvelteKit and SSR Behavior
Section titled SvelteKit and SSR BehaviorAs our tracker requires browser context to run, you mightn need to adjust the “Creating the tracker context” example like shown below to ensure that its imported and created inside client side:
<script>
  import { onMount } from 'svelte';

  onMount(async () => {
    if (process.browser) {
      const Tracker = await import('@openreplay/tracker');
      const tracker = new Tracker({
        projectKey: "", // pKey
        ingestPoint: "ingestPoint",
      })

      tracker.start()
    }
  })
</script>
Sample repo
Section titled Sample repoIf you’d like to review the complete code for this project, check out the repo we’ll be using throughout this tutorial.
It is a sample SvelteKit application that you can clone and test yourself by following the instructions in the Readme file.
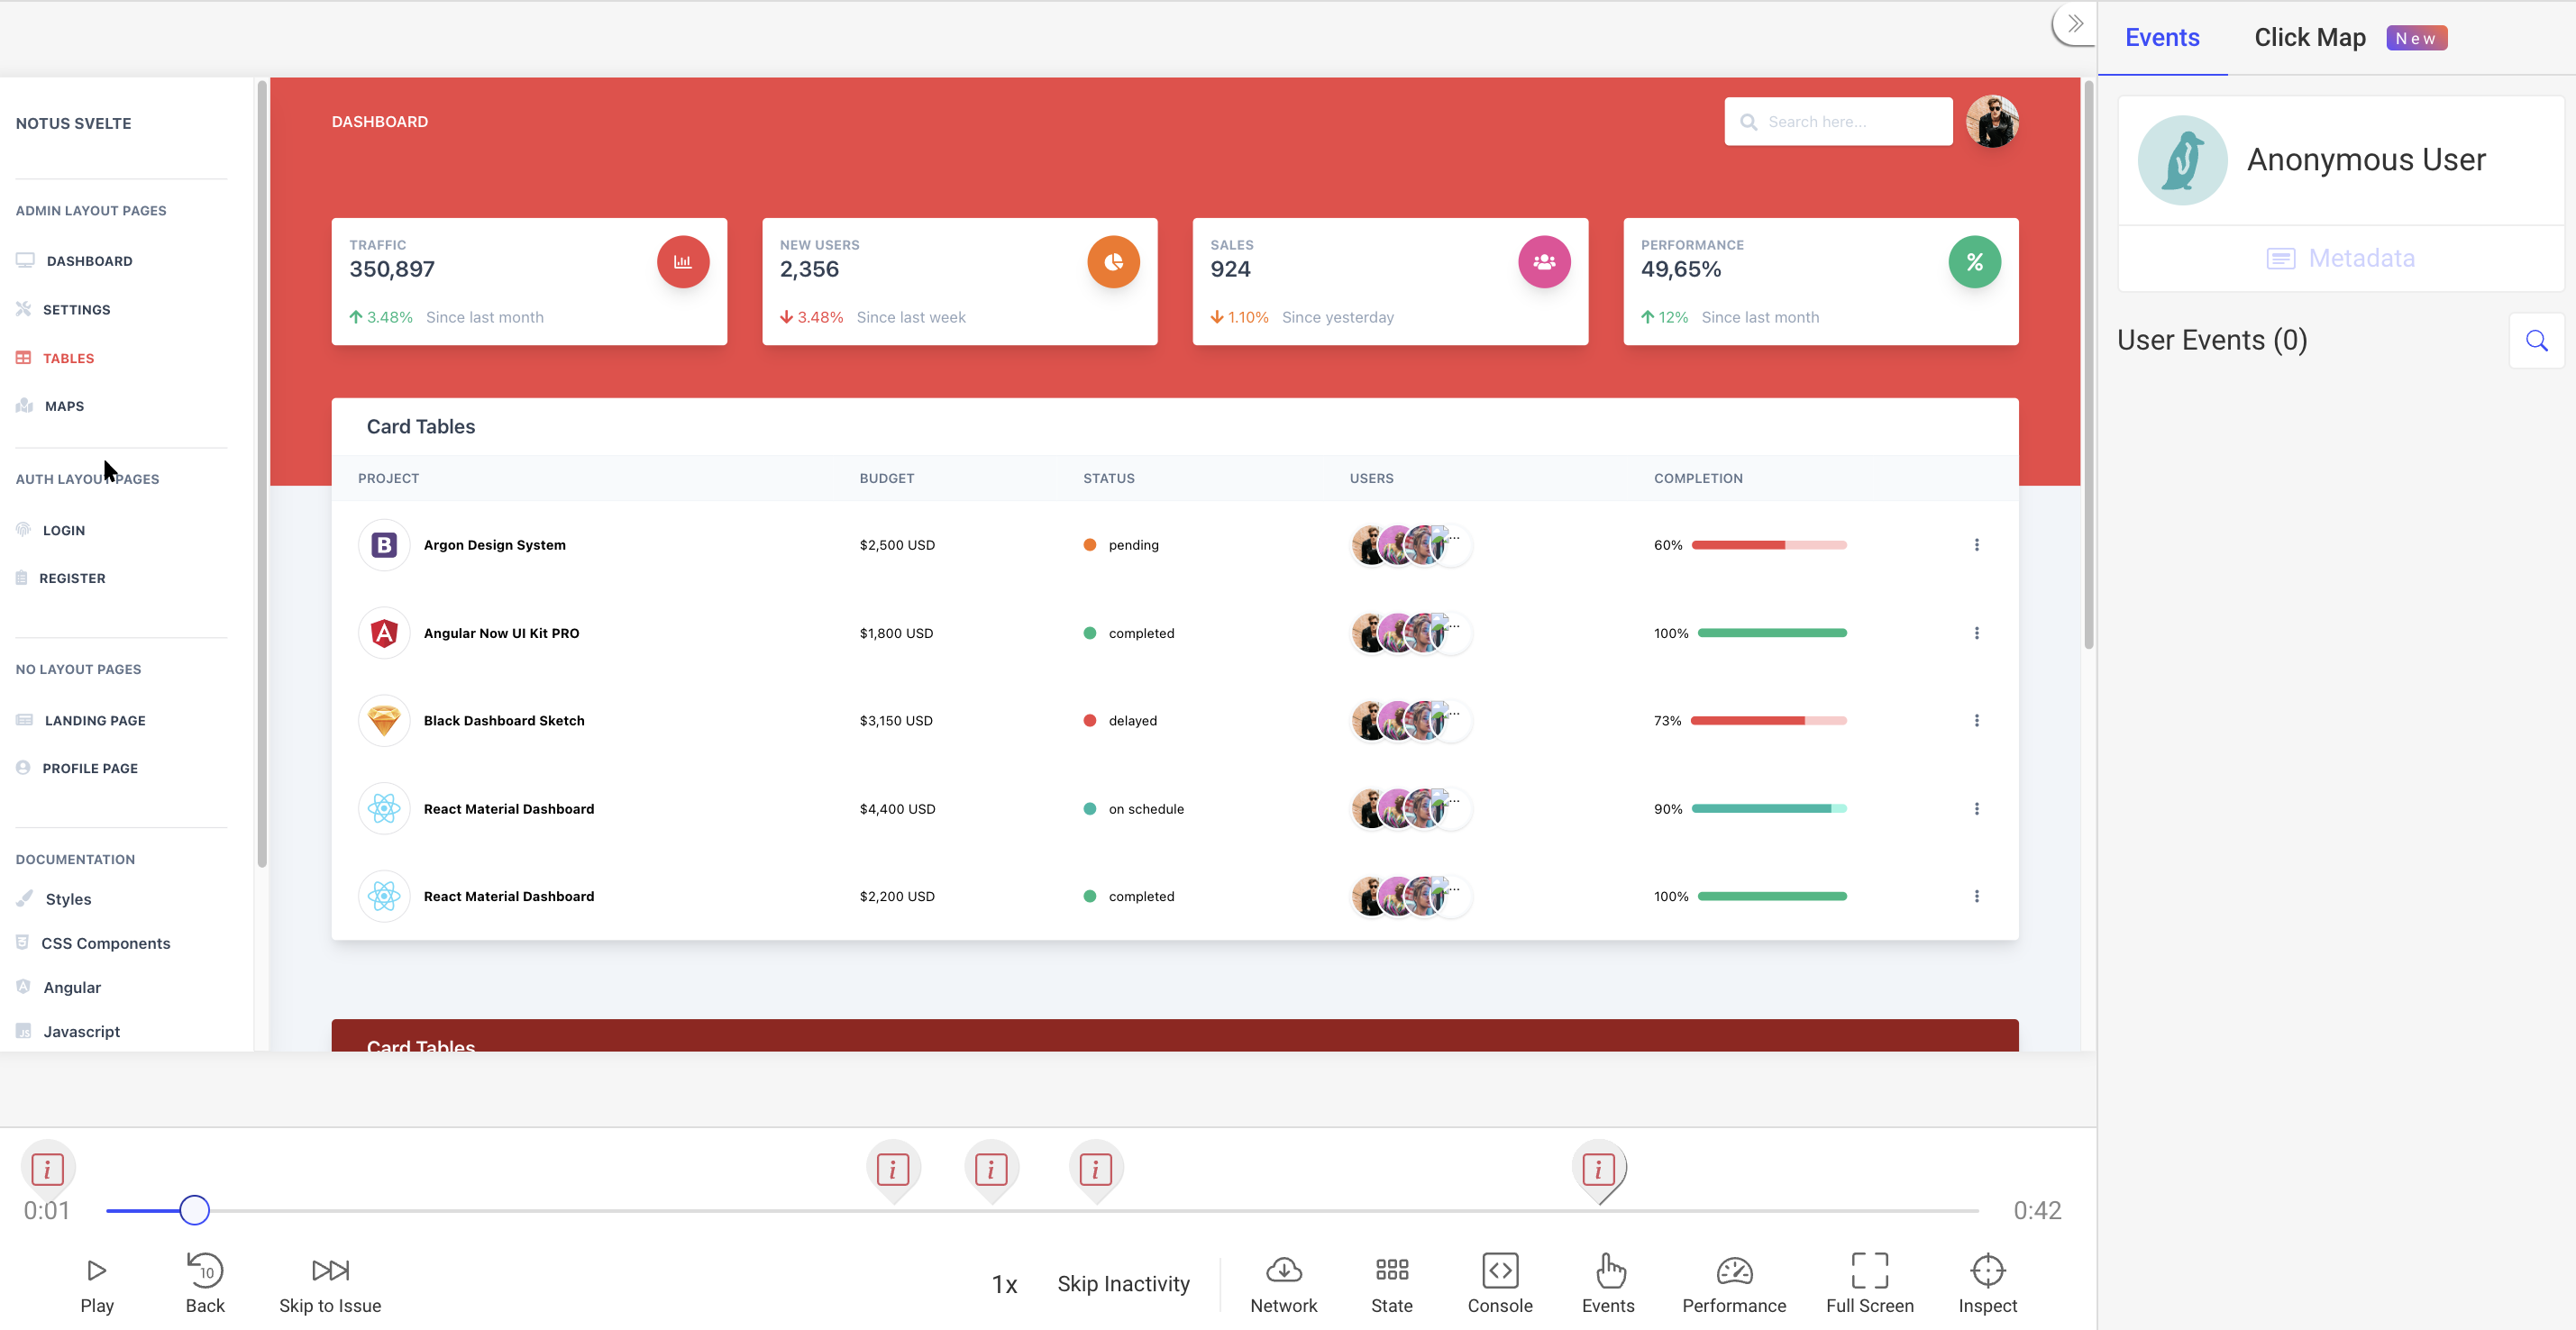
Once deployed and configured, you should be able to capture session replays as seen in the screenshot below:
Using Context to share data
Section titled Using Context to share dataThis solution will use Svelte’s Context, which allows you to share data between a parent component and all its children (much like React’s Context providers).
In this particular example, we’ll be adding the tracker for the Admin section of our application, so we’ll set the context within the Admin layout file (src/layout/Admin.svelte). Then we’ll start it at the first page rendered inside this section.
Creating the tracker context
Section titled Creating the tracker contextInside the src/layout/Admin.svelte file, within the script tag, let’s add the following code:
import {Tracker, key} from "../context/tracker"

let tracker = new Tracker({
    projectKey: __myapp.env.OPENREPLAY_PROJECT_KEY
});

setContext(key, {
 getTracker: () => tracker
} )
Of course, you’ll have more code inside this file but what you see above is relevant for us right now.
- We’re first importing the Tracker from OpenReplay and a key variable (more on these in a second).
- We’re then instantiating the Tracker. As you can see, the only configuration option we’re using is the project’s key, which you’d get from the UI after setting up the project in OpenReplay.
- We’re saving the tracker’s instance in the context created by calling
setContext. Thekeyvariable will later be used to retrieve this particular value from the context.
💡A note for self-hosted users: if you’re using the self-hosted version of OpenReplay, you’ll also have to specify the ingestPointconfiguration property in step 2. This property specifies the ingestion endpoint for the tracker’s data. Cloud users don’t need this, because, by default, the tracker will know where the SaaS version of this endpoint is, but if
you’re self-hosting it, you’ll need to specify it (it should be something like https://openreplay.mydomain.com/ingest).
Using the tracker context
Section titled Using the tracker contextUsing the context (and calling the start method) is as simple as getting the context through the getContext function from Svelte.
The context had an object with a function called getTracker , so we’ll destructure it and call that function.
import {key} from "../../context/tracker"

let {getTracker} = getContext(key)
onMount( () => {
  let tracker = getTracker()
  tracker.start()
})
Afterward, it’s just a matter of calling the start method from within the onMount callback. We do that to ensure that we’re calling this method from the browser, otherwise the tracker will not work.
The context/tracker file
Section titled The context/tracker fileWe’ve been using this file in both places, so it’s time we take a quick look at it.
This file is exporting two main elements:
- The
Trackerclass, which we’ve instantiated in the layout file. - We’re using the
keyvariable to save and retrieve the context.
Here is the content of the file:
import Tracker from '@openreplay/tracker'

const key = Symbol("openreplay tracker")

export {Tracker, key}
The only interesting bit here is that the key variable is not a simple string, it’s actually a Symbol. The reason for that is to avoid potential name collisions with other 3rd party libraries that also use the context.
Taking care of ENV variables
Section titled Taking care of ENV variablesThe last thing to review here is how we handle the project’s key, since it should not be hardcoded into your code.
Usually, you’d use an environment variable for this, however since we need that data in the browser and Svelte doesn’t provide an easy way to achieve this, we’ll solve this problem with two packages: dotevn and @rollup/plugin-replace.
On one side, we’ll use the dotenv package to gain the ability to define our env variables inside a .env file. We’ll define the one we need:
OPENREPLAY_PROJECT_KEY="<YOUR PROJECT KEY>"On the other hand, since we can’t use dotenv in our front-end code (because it depends on the fs module, which clearly it’s not available in the browser), we’ll use the replace plugin for roll-up. This plugin will replace code in our files for whatever we tell it to. So we’ll configure the plugin to replace the string “__myapp.env.OPENREPLAY_PROJECT_KEY” with the actual project key loaded from the .env file (thanks to the dotenv package).
To get this done, open the rollup.config.js file in the project’s root and add the following code into the plugins key.
replace({
  "__myapp.env.OPENREPLAY_PROJECT_KEY": `"${process.env.OPENREPLAY_PROJECT_KEY}"`
})
This plugin will run in the backend during the bundling process, making it possible for this to work. If you’d like to inspect the full content of this configuration file, you can check it out here.
Have questions?
Section titled Have questions?You can check out this repository for the complete source code of a working Svelte-based application with the Tracker.
If you have any issues setting up the Tracker on your Svelte project, please contact us on our Slack community and ask our devs directly!