Bugsnag
How to integrate Bugsnag with OpenReplay and see backend errors alongside session recordings.
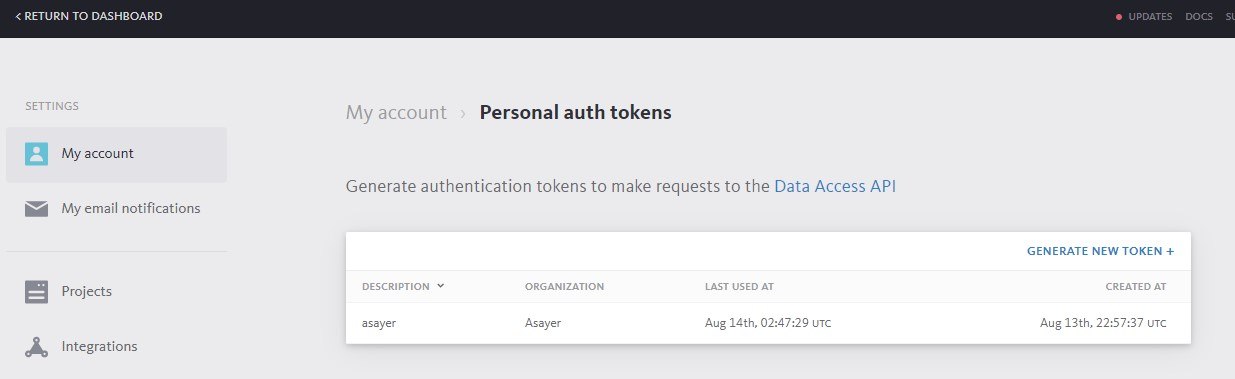
1. Create Authorization Token
Section titled 1. Create Authorization Token- Login to your Bugsnag account.
- Go to Settings > My account > Personal auth tokens.
- Click on the Generate new token + button.
- In the description put
openreplay. - Click the Generate button.
- Copy the token then hit the Done button.
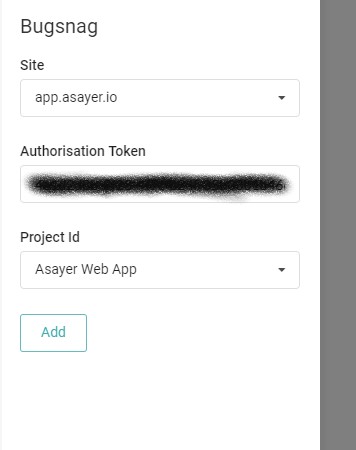
2. Enable Bugsnag in OpenReplay
Section titled 2. Enable Bugsnag in OpenReplayPut your Authorization token in OpenReplay dashboard under ‘Preferences > Integration’ and select the project that you want to track from the dropdown list.
3. Propagate openReplaySessionToken
Section titled 3. Propagate openReplaySessionTokenTo link a Bugsnag event with the recorded user session, a unique token has to be propagated from your frontend to your backend on each request you want to track. This can be done using a custom HTTP header. In the below example, we use the fetch function to send that header.
const headers = {
  Accept: 'application/json',
  'Content-Type': 'application/json',
};
if (tracker.getSessionToken()) { // use window.OpenReplay instead of tracker if you're using the snippet
  headers['X-OpenReplay-SessionToken'] = tracker.getSessionToken(); // Inject openReplaySessionToken
}
fetch('www.your-backend.com', {
  'GET',
  headers,
});
In order for OpenReplay to associate a Bugsnag log entry with the recorded user session, a unique token has to be propagated as a meta_data > special_info to each backend error you wish to track.
Below is an example in Bugsnag’s Python API.
bugsnag.notify(EXCEPTION_OBJECT, meta_data={"special_info":{"openReplaySessionToken": OPENREPLAY_SESSION_TOKEN}})The name of the tag openReplaySessionToken is case sensitive.
Have questions?
Section titled Have questions?If you encounter any issues, connect to our Slack or check out our Forum and get help from our community.